Setting up groups and inviting users
Groups are used to organize users and manage permissions
collectively.
Instead of assigning access rights to each user individually, you can
assign them to a group — and all members of that group inherit the same
permissions.
If a user needs access to additional resources, they can also belong to
multiple groups — their total permissions are then combined from all
assigned groups.
This structure makes it easier for administrators to manage access across teams, departments, or locations that share similar responsibilities. It also provides a scalable and efficient way to control access to screens, channels, media, and other Smartsign resources from a single place.
Creating groups
Before adding users to your site, it’s a good idea to plan your group structure. A clear group hierarchy helps ensure that users receive the correct permissions as soon as they sign in.
For example, you can create groups based on country, office location, or department — such as Sweden, Germany, or Head Office. Each group can then have access to its own screens, media folders, and channels, while still following the same overall site structure.
Once you have planned your setup, you can create your first group.
- Go to Users and Groups
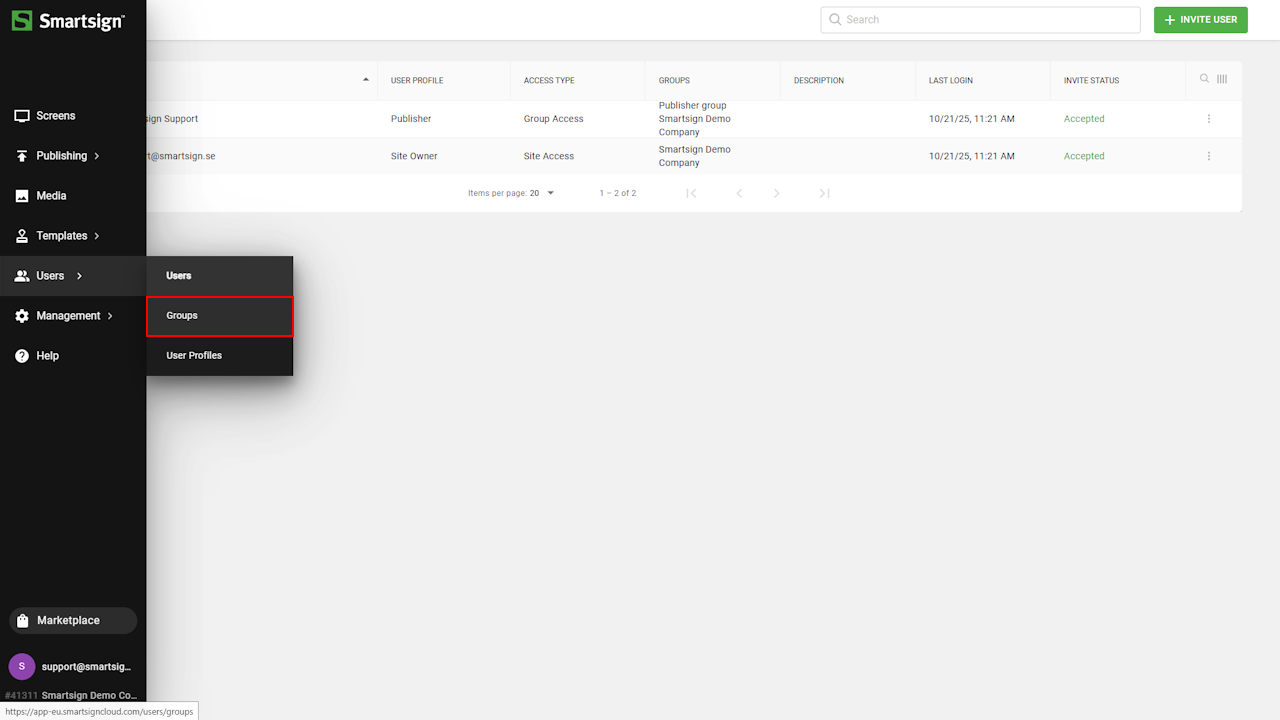
- The Groups section displays all existing groups on the site.
Here, you can view members, permissions, and manage access levels for each group.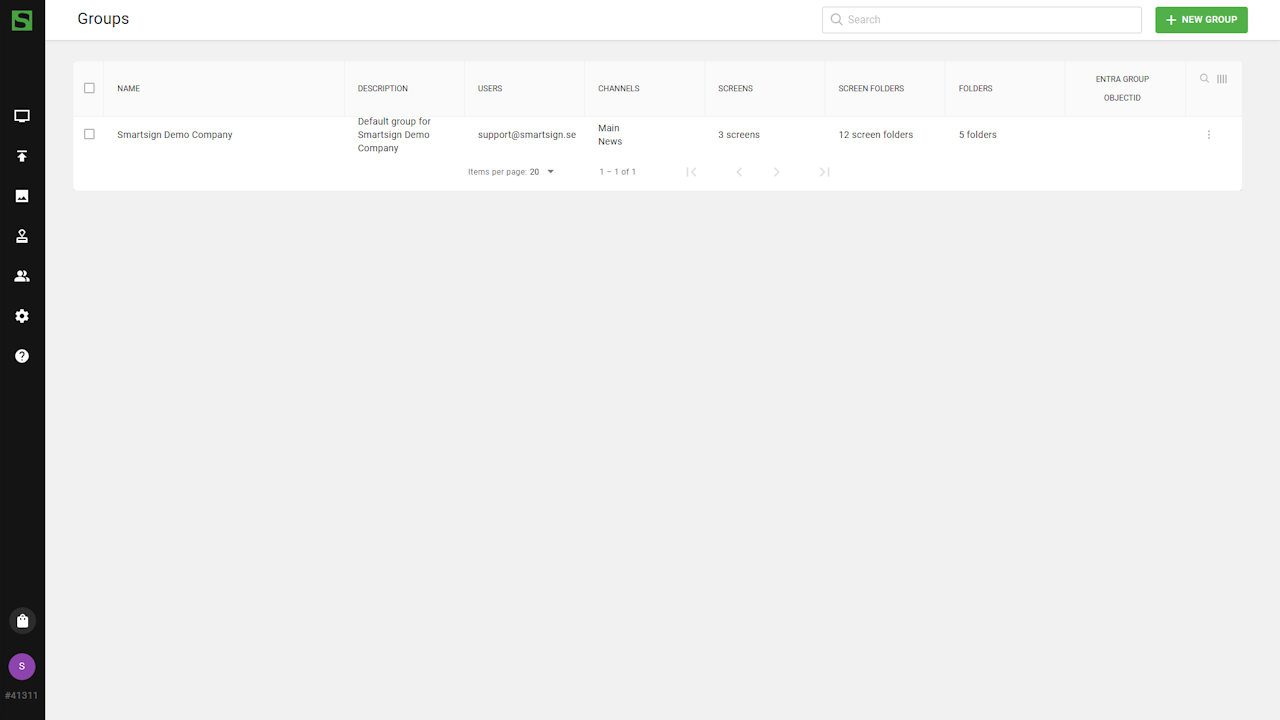
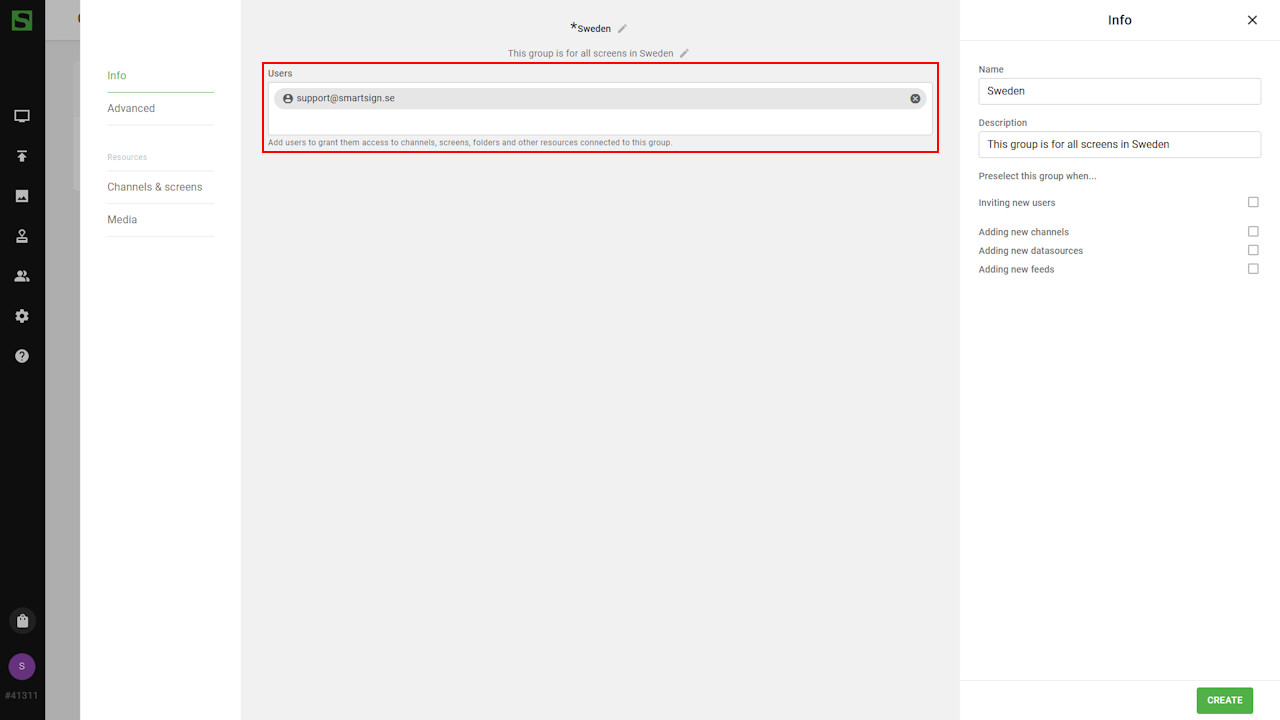
- Click New Group
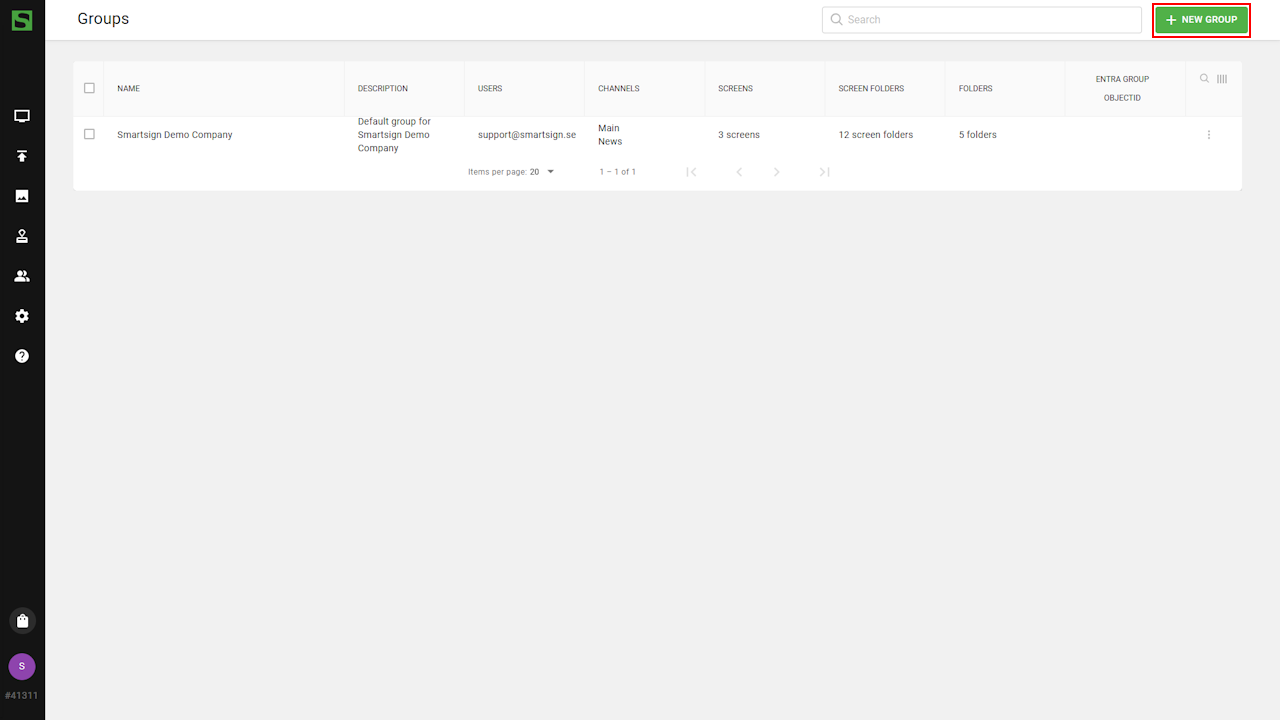
- Enter a name and description to identify the group’s purpose.
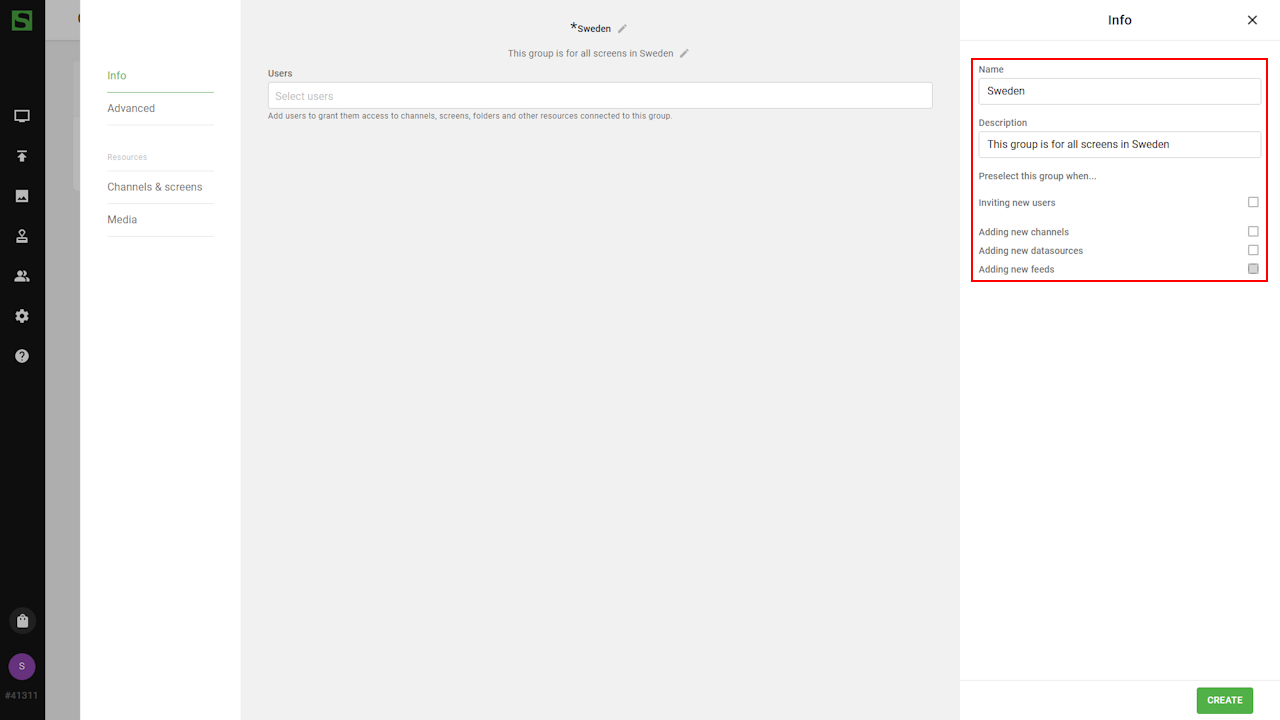
- If you already have users on your site, you can add them directly
to the group.
note
Only Group Access user types follow group permissions.
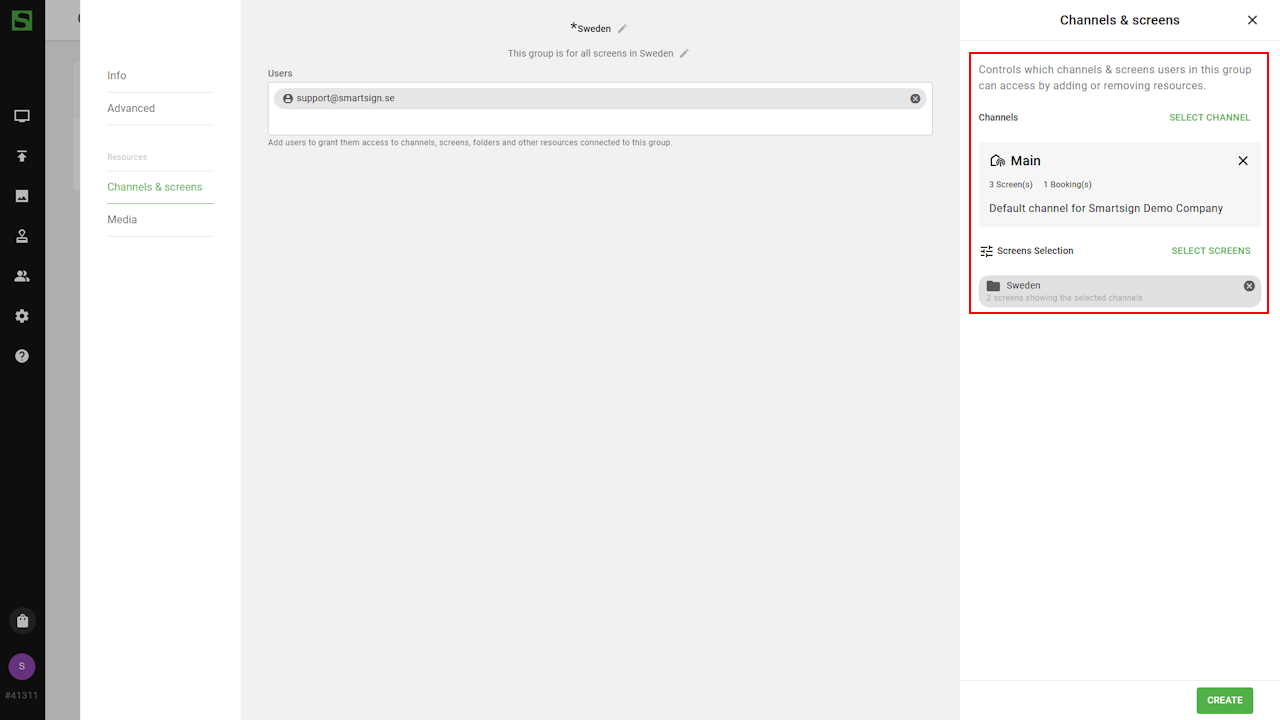
- Add the channels and screens that the group should access to.
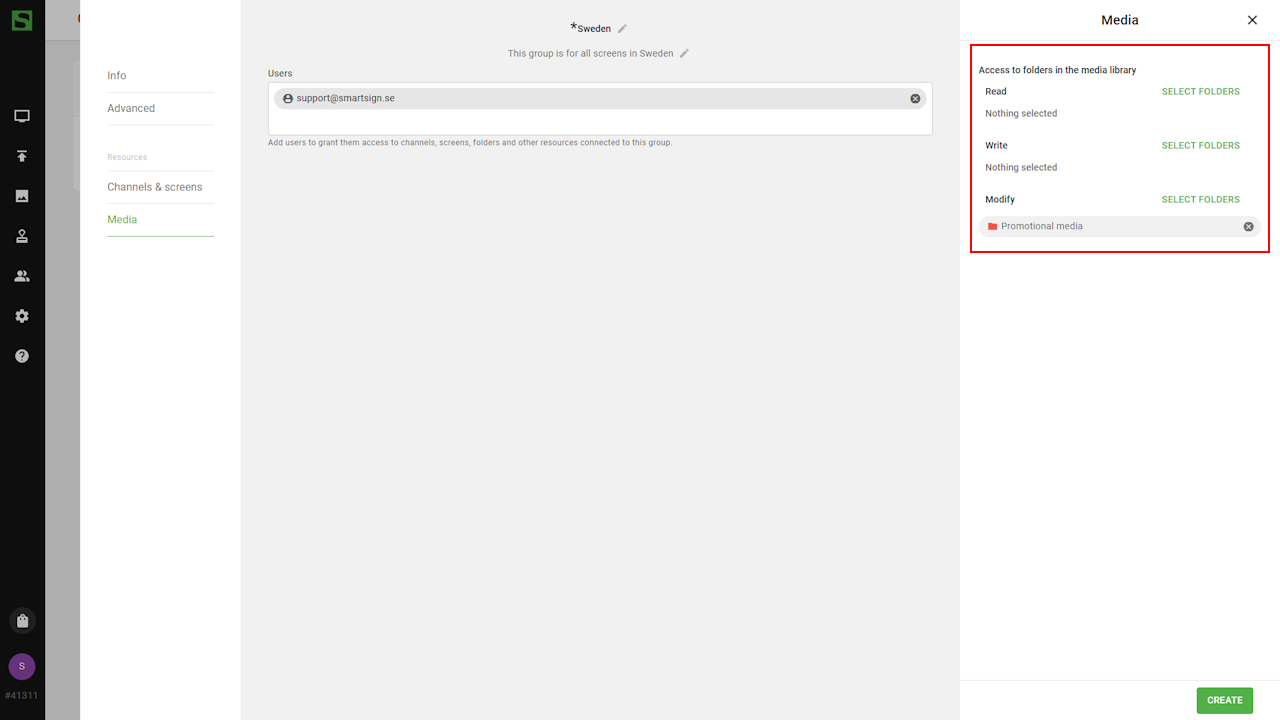
- Add media folder permissions as needed.
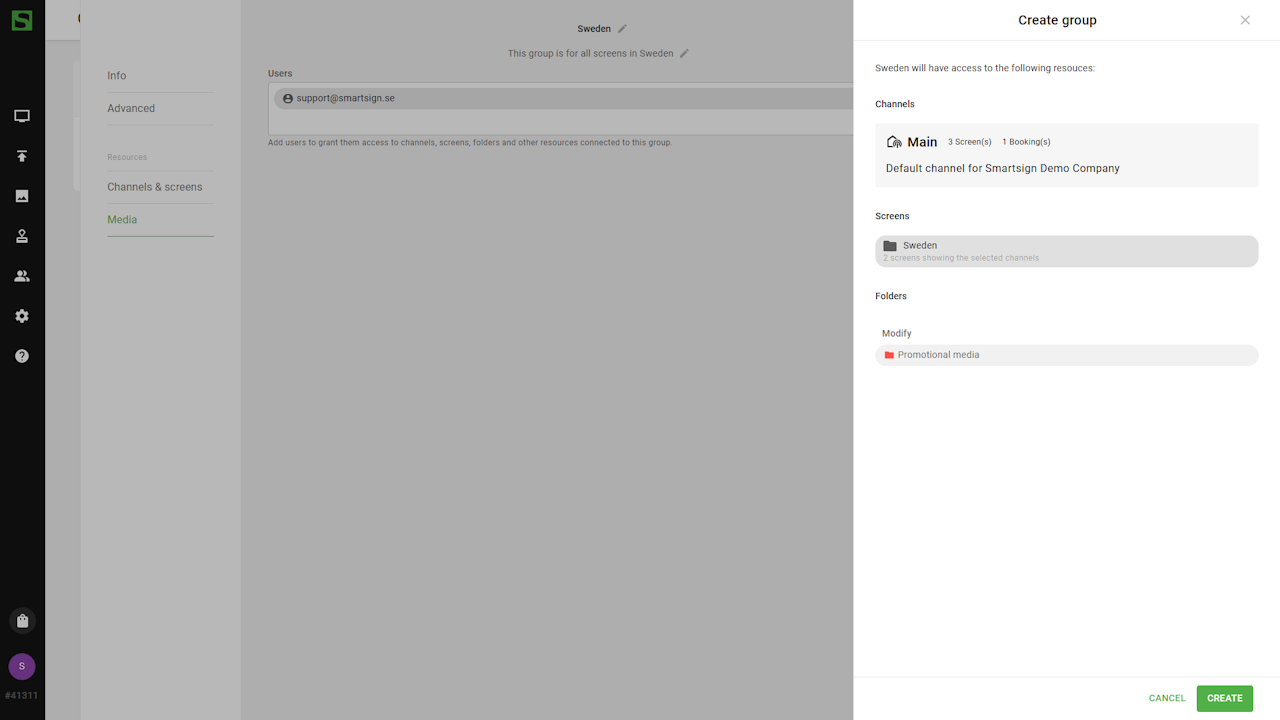
- When all settings are complete, click Create to finalize and
create the group.
Once your groups are set up, you can start inviting users to your site.
Adding users
Adding new users is a simple two-step process:
- The administrator defines the user profile and access permissions (using groups), then sends an invitation to the user’s email address.
- The user receives the email invitation and follows the steps to create an account, sign in, and accept the invitation.
This workflow ensures that administrators can manage access securely, while giving users a smooth and straightforward onboarding experience.
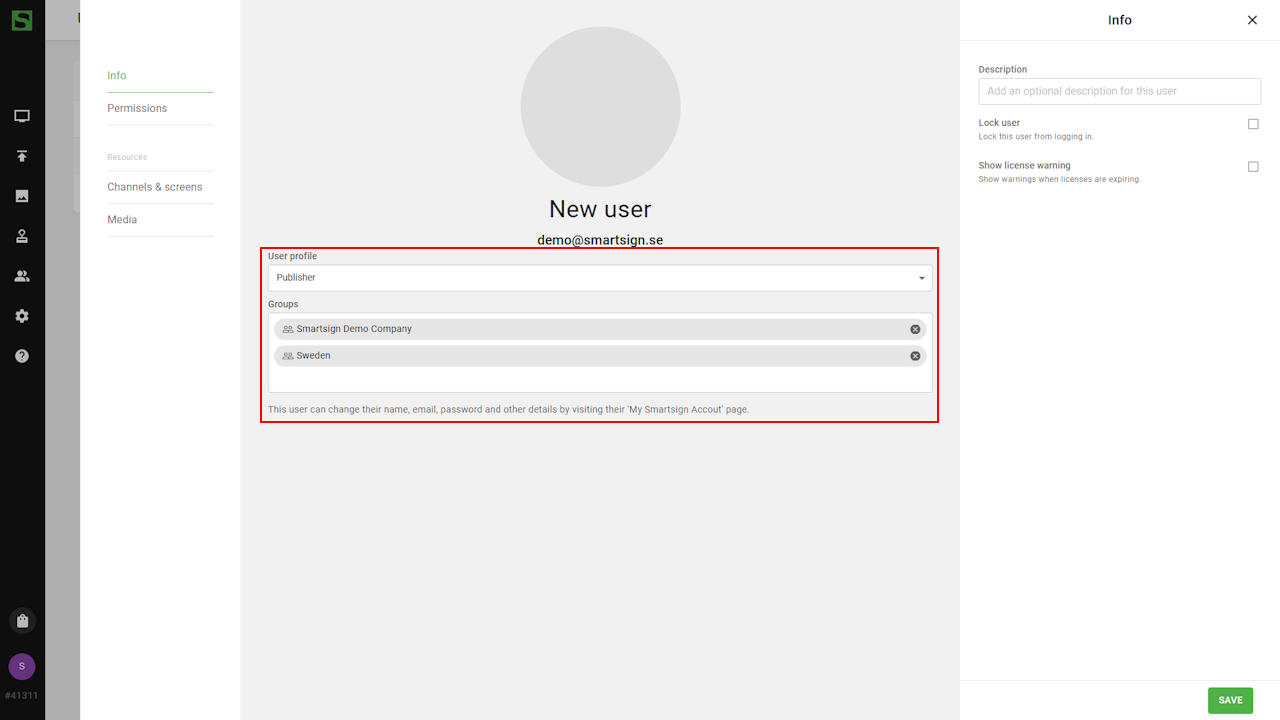
User Profiles
User profiles define what actions each user can perform in Smartsign. They determine a user’s level of control within their assigned groups or site.
The main profiles are:
- Site Owner – Full access to all resources on a site.
- Group Admin – Manages users, screens, and media within a group.
- Publisher – Can create, schedule, and publish content within their assigned groups but has limited administrative rights.
Profiles can also be customized to fit your organization’s specific roles and workflows. See User Types and Profiles article for more details.
How to invite users
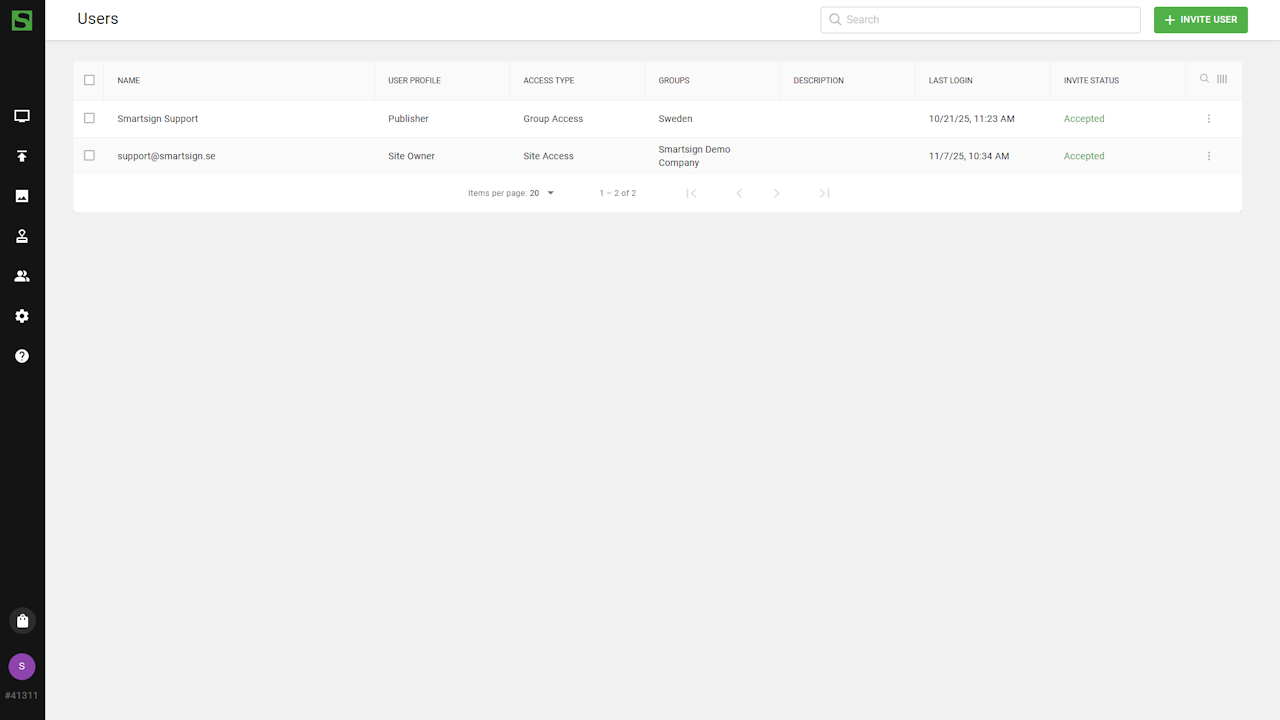
- Go to Users in the main menu.

- The Users section will show all existing users on the site.
You can use the column filters to sort and search for specific users.
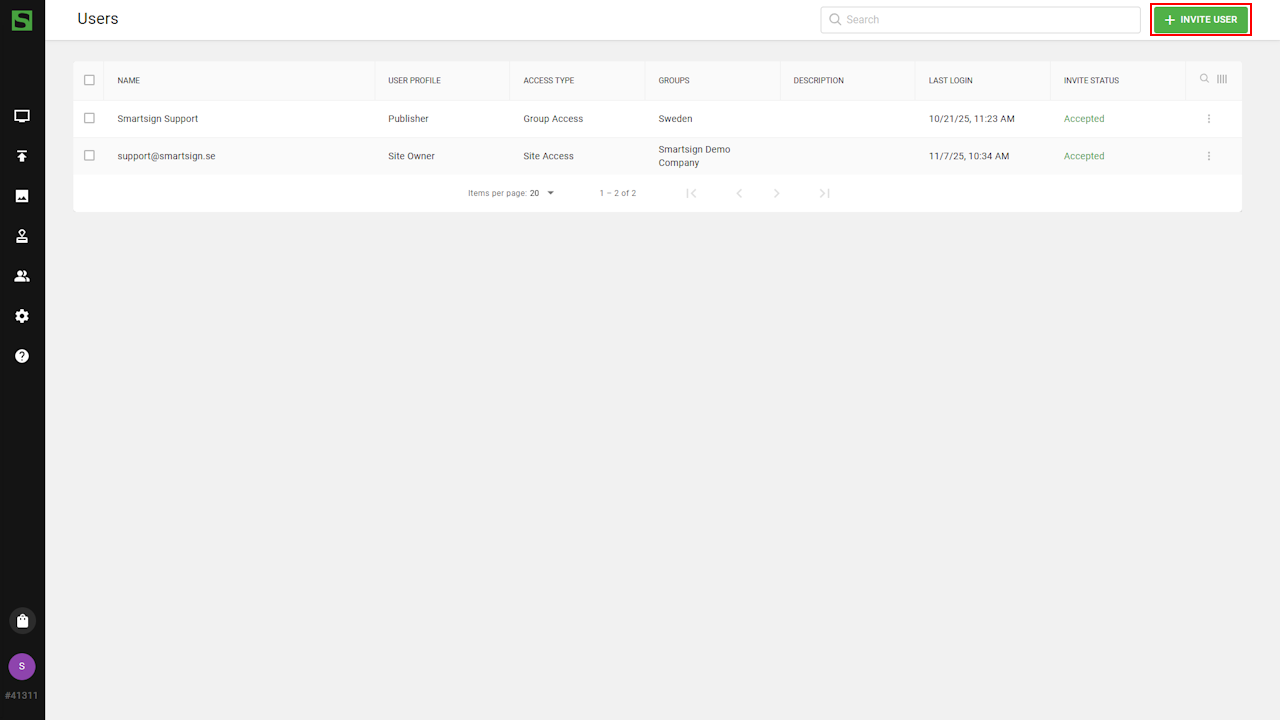
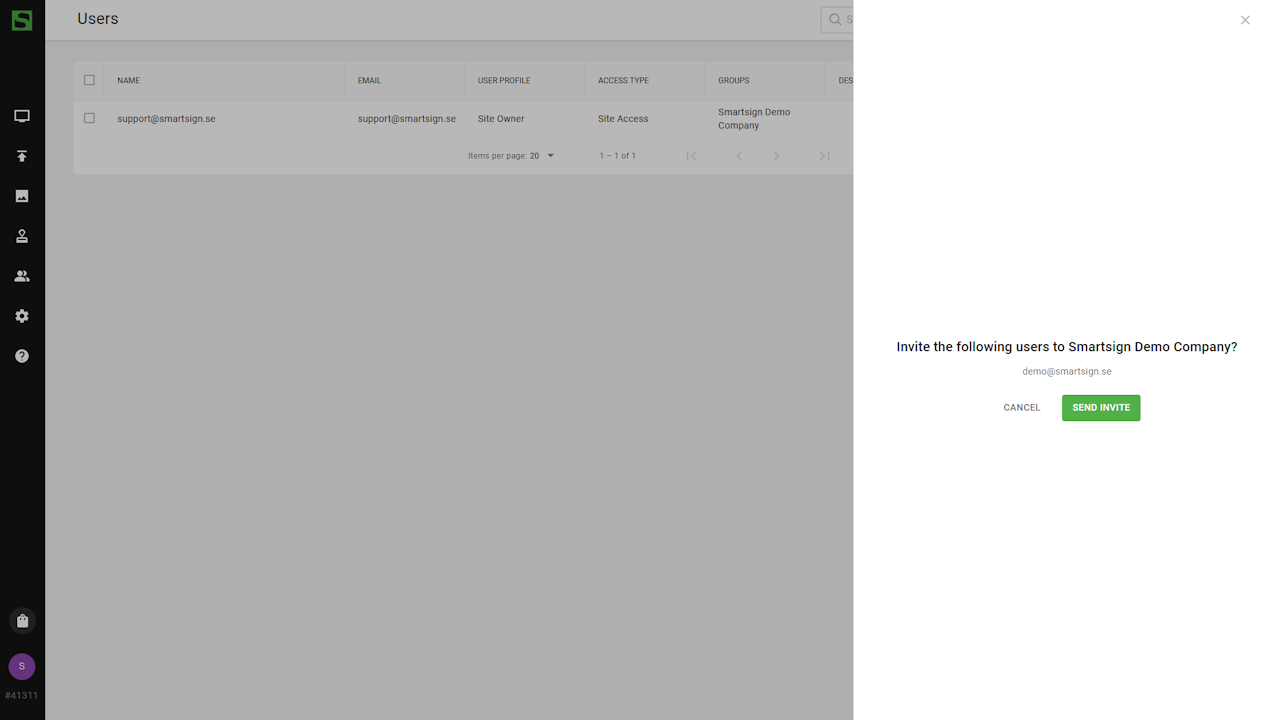
- Click Invite User.
- Enter the email address of the user you want to invite. It is
possible to invite multiple users at once by entering several email
addresses in the field.
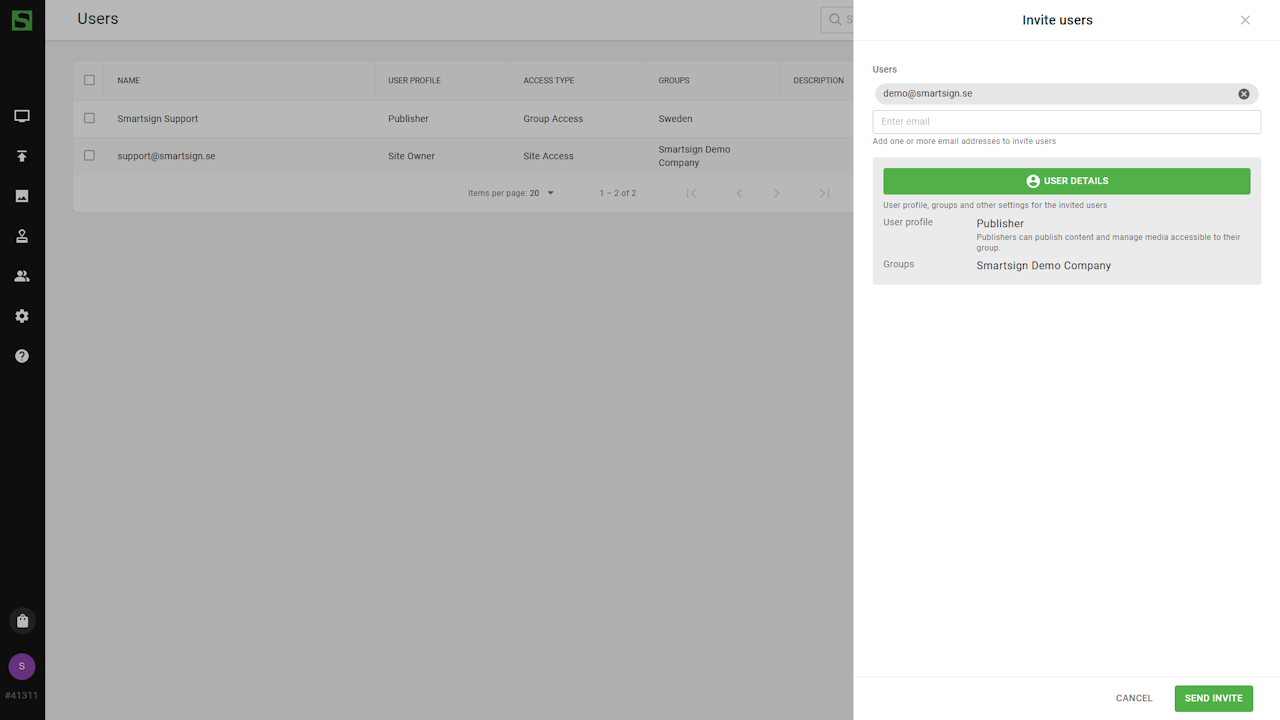
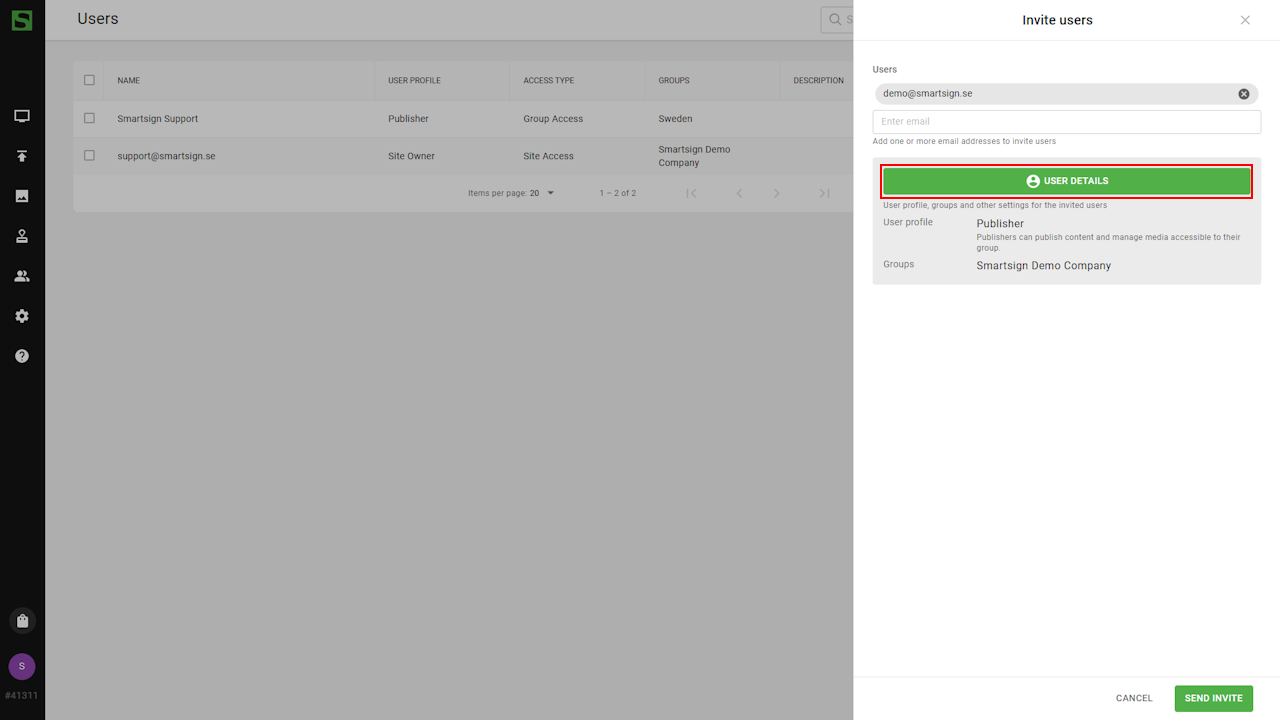
- Select User Details to adjust the user profile, group access or
review their current permissions before sending the invitation.
- When ready, click Send Invitation.
The user will receive an email invitation to join the site.
- The new user now appears in the user list with the status
Pending.
Once the user creates their account, signs in, and accepts the invitation, the status will automatically update.